Your frontend, your config
The way frontend is done today, knowing how to configure bundling tools has become as relevant as knowing CSS, HTML and JS. For most of us, the code we write, with or without a framework, involves some level of processing.
This is the precursor to our Webpack tutorial. It’s meant to prove a point that the tools used for learning things like React, mostly fail to give an impression of a realistic configuration. By learning the basics of a bundle configuration, we are able to make better apps, more efficient configs and work with other bundlers and libraries.
Create React App & co.
There is no ready-made or base config that covers the needs of a living, breathing application.
Learning React
Everyone needs help when learning. Create React App and similar are great for that. We don’t want to spend time learning configuration when we are eager to learn a framework, check out a library or make a quick proof-of-concept. It’s probably also easier to learn the configuration when we have some grasp of what needs to happen to the code we write before it can run in the browser.
Zero-configs
Zero-config plus config equals two configs. These tools work fine in many cases, even in production, but when you start building on top of a zero-config, you probably have to start dealing with some sort of hidden config as well. Potential conflicts occur, and troubleshooting gets more difficult because we have to find out if it’s our config or the zero-config config.
Since we rarely get away without any custom config, we are already in the business of setting up our own. It’s better to pick a zero-config because you know about its limits and possibilities than because you don’t know how to config.
Where Create React App fails
It’s completely understandable if you have felt regret or just become overwhelmed when ejecting Create React App.
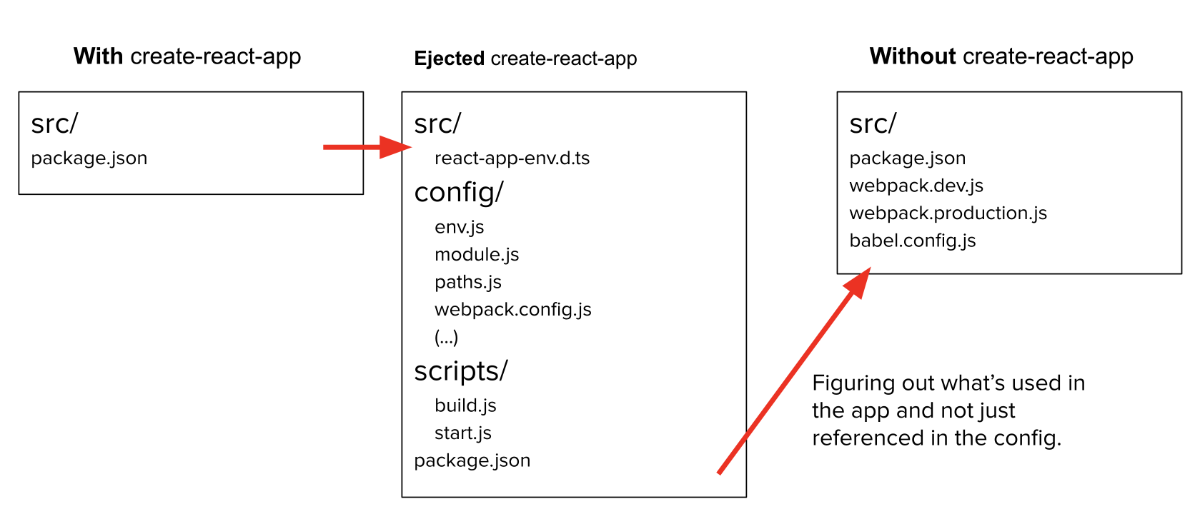
An ejected Create React App is not a realistic example of what a config should look like. It’s a mess of folders, huge config files and scripts, dependencies you probably don’t use and thousands of lines of code that surpass a small application. When this is many people’s first meeting with a full Webpack config, it becomes off-putting. Of course, no one wants to learn how to make that! It’s a really difficult starting point for learning how to configure a project.
We end up avoiding it, becoming content as long as it works. And when we have to do something about it, we end up throwing things at the wall, having a hard time getting the full picture. We just want it to work again! Which leads us to look for quick solutions, maybe copying things blindly, seeing what sticks in the end. Adding to an already big config. We get it to work and hope for the best. But it doesn’t sit well with us.
It also reflects badly on Webpack which has gotten a reputation of being big, complex and difficult to understand. In most cases, it is what you make it. And that’s the good news, the tempting-looking configs we get from ready-mades, we can make that on our own.
Make your own config
If you’re still in doubt, the Create React App readme states (at time of writing) that it’s not intended or recommended for production use.
When you use ready-mades or zero configs, the reality is that someone else has configured your app. And it’s neither based on your needs or a set of best practices.
Size and transparency
By doing our own configuration, we get smaller configs. It’s easier to see which parts do what and how it all fits together. It benefits us across applications and across teams because everyone can see what’s going on.
Transparency doesn’t mean that every config should be identical, but that the different tailored configs are comprehensible and everyone has some sense of what’s going on. It makes it easier to share information, recommendations and bugfixes.
Dependencies you need
If we use tools with dependencies we don’t need, who are we updating those unused dependencies for?
When we configure our own project, we only add what we need. And we don’t spend more time than necessary to keep our project up to date. Because we have direct access to our dependencies, we can choose which ones to update, and if something breaks, it’s easier to find the culprit.
Less updating, faster troubleshooting and faster build times are what we get when we run only with things that we need. And for our users, the bundles might be smaller.
Not using React
Maybe you want to use Preact, Svelte or Vue. Or don’t want to use Webpack. There are ready-mades here as well – but wouldn’t it be nice to work with them in the bundler of your choice? Learning to configure one framework in one bundler provides a good base for switching and testing others.
Cleaning up an ejected config
Or how to get rid of 7000 lines from your app.
This isn’t a tutorial but we will leave you with some directions if you have ejected and feel overwhelmed.
Depending on what you’re comfortable with, you can copy your application without any config into a new folder and set it up from scratch. That’s probably the easiest way. If it’s the first time, you can try our tutorial first before repeating the steps with your own project.
Or you can take the scenic route and start removing things.
Get rid of all the dependencies you don’t use. It usually involves looking up a lot of dependencies to figure out what they’re for, but that can be useful knowledge to have anyway. Running npx npm-check will list all dependencies and their status. If something shows up as not in use, it’s worth looking into if it can be removed. It’s not bulletproof but gives an indication. Additionally, you can search your code for any reference.
If you try building after you have removed dependencies, it will probably fail because most of them are still referenced in the config. This too has to be cleaned up. Again, starting from scratch is probably easier.
You should also delete the scripts folder and add scripts for building and running to the package.json instead.
Every project is different, but you will end up with a lot smaller total after the cleanup.